Tutorials on how to setup CDN on WordPress using MaxCDN and W3 Total Cache is already abundant on the internet. But I did not see any tutorial on doing it using WP Super Cache. I opted to use WP Super Cache instead of the W3 Total Cache because I don’t like changing my caching plugin.
So, how do you setup MaxCDN on a WordPress blog? Here’s how.
1. Create a pull zone on MaxCDN and a CNAME record. I’ll just refer you to an easy to follow tutorial on how to do this on WPVeda. Just follow that guide up to step 3 (Creating a CNAME record) then come back here. 😉
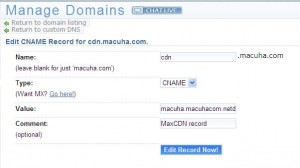
2. By this time, you already created a pull zone and a CNAME record. Setting the CNAME record varies from registrar to registrar. If you are still confused, here’s how I created the CNAME record for macuha.com on Dreamhost.

Click image for larger view
Wait for 24 hours to make sure your settings are propagated already. After 24 hours, configure WP Super Cache.
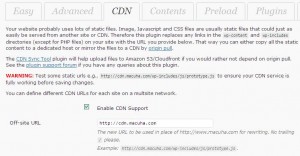
3. Simply go to CDN tab of the WP Super Cache settings, check the Enable CDN Support and input your CDN URL on the Off-site URL.

Click image for larger view
4. Check your site’s source code and make sure that images and css files are now served using the CDN URL. For example:
https://www.macuha.com/wp-includes/images/smilies/icon_smile.gif
is now served as
http://cdn.macuha.com/wp-includes/images/smilies/icon_smile.gif
5. Clear your WP Super Cache contents to make sure all your pages will now start uploading files on the CDN pull zone and start serving CDN files to the visitors.
That’s all folks!


Salamat sa tuts…. tagal ko na tong hinihintay….